
Zenfone 10 display repair guide
The Asus ZenFone 10 is a powerful smartphone, but like any device, its screen is vulnerable to damage from accidental drops, impacts, or technical malfunctions. Obviously, an unresponsive screen disrupts daily usage, making navigation, calls, and gaming difficult.
If your ZenFone 10 screen is broken or showing display issues, this guide will walk you through troubleshooting to identify the cause of any malfunctions, as well as the process to safely replace your screen if necessary.
At Asus Accessories, we specialize in genuine Asus replacement parts, ensuring your devices get the best quality repairs. Whether you need a ZenFone screen replacement, batteries, chargers, or other essential components, we provide only original Asus products.
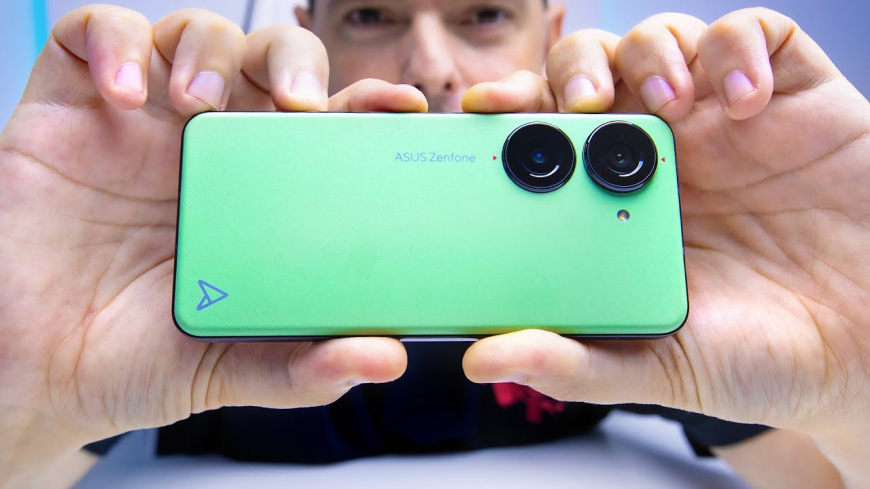
The Zenfone 10 is comfortable and easy to use with one hand, with a width of just 68.1mm and a weight of 172g.
Signs that your ZenFone screen needs replacement
Before diving into the repair process, it’s important to determine whether your ZenFone 10 screen needs to be replaced or if there’s an alternative fix. Here are common warning signs that indicate a screen replacement is necessary:
- Unresponsive Touchscreen: The screen no longer registers taps or swipes.
- Flickering or Black Screen: The display is unstable, flickering, or completely black despite the phone being powered on.
- Distorted Colors or Dead Pixels: Areas of the screen display incorrect colors, lines, or blank spots.
- Ghost Touches: The phone registers touches that you didn’t make, making it difficult to navigate.
If you’re experiencing any of these issues, replacing the screen is likely the best solution.
Troubleshooting before replacing your Sscreen
Before committing to a screen replacement, try these troubleshooting steps. You can also view our guide to the most common problems with Zenfones and how to resolve them.
- Restart Your ZenFone 10 – A software glitch could cause an unresponsive screen. Restarting may resolve minor touch issues.
- Check for Software Updates – A system update can sometimes fix touchscreen problems caused by firmware bugs.
- Inspect for Loose Connections – If the phone was dropped but the screen isn’t cracked, the display connector inside the phone may have come loose.
- Try a Soft Reset – If the phone isn’t responding, hold the power button and volume down for 10–15 seconds to force a restart.
If none of these steps restore your screen’s functionality, it’s time to proceed with a screen replacement.
What you’ll need for the ZenFone 10 screen replacement
Replacing the screen of your Asus ZenFone 10 requires specific tools and components to ensure a successful repair.
Required Tools:
- Replacement ZenFone 10 Screen – Purchase a genuine Asus screen for a perfect fit and quality. For assistance choosing the correct display for your exact model, contact our team with your serial number.
- Precision Screwdriver Set – For removing tiny screws without damage.
- Plastic Pry Tool & Spudger – To safely separate the screen from the frame.
- Adhesive Strips or Glue – To secure the new screen in place.
- Heat Gun or Hair Dryer – To soften the adhesive before removing the old screen.
- Tweezers – For handling small internal components.
- Anti-Static Wrist Strap (Optional) – Prevents electrostatic discharge that could damage components.
Safety Precautions:
⚠ Backup Your Data – Before any repair, back up your files in case something goes wrong.
⚠ Work on a Clean Surface – Use a well-lit workspace with enough room to organize small parts.
⚠ Use Genuine Replacement Parts – Third-party screens may not fit correctly or function properly.
⚠ Power Off Your Phone – Never attempt a repair with the device powered on.
Step-by-Step - Replacing the ZenFone 10 screen
Step 1: Power down and remove the SIM tray
- Turn off your phone and disconnect it from any charger.
- Use a SIM ejector tool to remove the SIM tray. This prevents damage during disassembly.
Step 2: Apply heat to loosen the screen adhesive
- Using a heat gun or hairdryer, gently heat the edges of the screen for 1–2 minutes.
- Do not overheat—excessive heat can damage internal components. You want it warm to the touch, not hot enough to burn your fingers.
Step 3: Pry open the screen
- Insert a plastic pry tool under the edge of the screen.
- Carefully work around the edges to lift the screen without breaking it.
- Be mindful of the display cables attached to the screen.
Step 4: Disconnect the display cables
- Once the screen is partially lifted, locate the display ribbon cables attached to the motherboard.
- Use tweezers to carefully disconnect them.
Step 5: Remove the old screen
- Once all connectors are detached, fully remove the broken screen.
- Clean the frame to remove any leftover adhesive or debris.
Step 6: Connect and test the new Screen
- Before securing the new screen, connect the ribbon cables and power on the device.
- Ensure touch response, brightness, and display functionality are working properly.
- If everything is functional, power off the device and proceed to the next step.
Step 7: Secure the new screen
- Apply new adhesive strips or phone-safe glue to the frame.
- Carefully align and press down the new screen into place.
- Let the adhesive set for at least 30 minutes before turning your phone on.
Step 8: Power on and final checks
- Turn on the phone and check if the touchscreen, brightness, and colors display correctly.
- Reinsert the SIM tray, and your ZenFone 10 is good as new! 🎉
The Zenfone 10 has an IP68 rating for water and dust resistance!
Preventing Future Screen Damage
To avoid another costly repair, consider using a Screen Protector! A tempered glass screen protector absorbs impact and prevents scratches. You could also invest in a shockproof case and be careful to keep your phone out of direct sunlight.
Choose original Asus replacement parts
Using an original ZenFone screen, manufactured by Asus ensures perfect fit and touch sensitivity – No misalignment or laggy response.
Replacing the screen on your Asus ZenFone 10 is a doable DIY repair with the right tools, patience, and genuine replacement parts. By following these step-by-step instructions, you can restore your phone’s display and extend its usability. However, if you are uncomfortable at any point during the repair, it's best to consult a professional. Asus Accessories empowers you to enact your own repairs ad save money, but it's better to be safe than sorry if you are unsure!
If you need assistance in choosing the right replacement screen, contact our Asus Accessories tech team before ordering!